Monday, September 13, 2010

Out West, Woodgrain, and Perfect Punches

Stamp Sets:  Out West, Woodgrain, and Perfect Punches
Card Stock:  Very Vanilla, Early Espresso, and Crumb Cake
Ink:  Very Vanilla and Early Espresso
Accessories:  Stampin' Sponges and 2" x 1-3/8" Oval Punch

Just Believe

Stamp Set:  Just Believe
Card Stock:  Basic Black, Sahara Sand, and Neutrals Patterns Designer Series Paper (item #117157)
Ink:  Basic Black
Accessories:  Basic Black 5/8" Satin Ribbon

Elizabeth and Teahouse

Stamp Sets:  Elizabeth and Teahouse
Paper:  Whisper White and Pretty in Pink
Ink:  Perfect Plum
Accessories:  White Grosgrain Ribbon


Wednesday, June 30, 2010

Artistic Etchings

Stamp Set:  Artistic Etchings
Ink:  Pretty in Pink, Basic Black and Very Vanilla
Paper:  Newsprint DSP and Blushing Bride
Accessories:  Very Vanilla Grosgrain Ribbon, 1 38 x 5/8 Oval Punch, Cutter Kit, Big Shot and Ovals Originals Die

My Digital Studio Card

Paper:  Whisper White, Daffodil Delight, and Pumpkin Pie

I used My Digital Studio to create this card, then I used my home printer to print it up on Whisper White Card Stock.  I used the  Summertime Splendor Designer Series Paper and the sentiment is from the Upsy Daisy Stamp Brush Set.  Takes a little work to figure out your printers setting, but it's worth it!

Studio Sketches and Perfect Punches

Stamp Sets:  Studio Sketches and Perfect Punches
Paper:  Whisper White and Early Espresso
Ink:  Black Staz On, Marina Mist, Early Espresso, and Pear Pizzazz Stampin' Write Markers
Accessories:  Aqua Painters, Round Tab Punch, Big Shot, and Vintage Wallpaper Embossing Folder

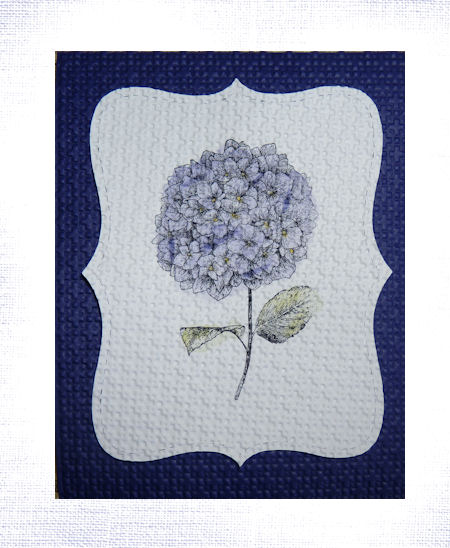
Because I Care

Stamp Set:  Because I Care (Level 1 Hostess Set)
Paper:  Whisper White and Concord Crush
Ink:  Black Staz On, Concord Crush, Pear Pizzazz, and Daffodil Delight Stampin' Write Markers
Accessories:  Aqua Painters, Big Shot, Square Lattice Embossing Folder, and Top Note Die
I discovered how to use the Stampin' Write Markers with Aqua Painters.  Use the brush end to apply a small amount of ink to the image, then run the Aqua Painter over it!  So simple.  

I ran the stamped image through the Square Lattice Embossing Folder upside down.  I ran the Concord Crush card base through the Square Lattice Embossing Folder right side up.  I liked the different textures.

Perfect Punches

Stamp Set:  Perfect Punches
Paper:  Chocolate Chip, Pear Pizzazz, and Greenhouse Gala DSP
Ink:  Chocolate Chip
Accessories:  Stampin' Dimensionals, Curly Label Punch, Big Shot, and Beautiful Wings Embosslits Die


Artistic Etchings

Stamp Set:  Artistic Etchings
Paper:  Pink Pirouette, So Saffron, Chocolate Chip, Retired DSP
Ink:  Chocolate Chip and Pretty in Pin
Accessories:  5/8 inch Chocolate Chip Satin Ribbon and Ticket Corner Punch


Occasional Quotes and Elements of Style

 Stamp Sets:  Occasional Quotes (Level 3 Hostess Set) and Elements of Style
Paper:  Baja Breeze and Peach Parfait
Ink:  Baja Breeze and Peach Parfait Stampin' Write Marker
Accessories:  Big Shot, Scallop Circle #2 Die, and 1/8 inch Marina Mist Taffeta Ribbon

A color selection from the new Color Coach.  It's growing on me.

Tuesday, April 27, 2010

Elements of Style

Stamp Set:  Elements of Style
Card Stock:  Very Vanilla and Always Artichoke
Ink:  Crushed Curry and Always Artichoke Stampin' Write Markers
Accessories:  Eyelet Border Punch, Vanilla Shimmer Smooch Spritz, and Color Catcher

Used the Stampin' Write Markers to color the stamp.  After assembling the card, spray with the Vanilla Shimmer Smooch Spritz.

Motorcycle

Stamp Set:  Motorcycle
Ink:  Night of Navy
Card Stock:  Whisper White, Night of Navy, and Brushed Silver
Accessories:  Big Shot, Perfect Details Texturz Plate, Silver Foil Smooch Spritz, and Color Catcher

After running the Night of Navy card stock through the Big Shot, spray with the Silver Foil Smooch Spritz. After stamping the motorcycle image, spray with Silver Foil Smooch Spritz.  The faux "ribbon" was also sprayed with Silver Foil Smooch Spritz.

Greenhouse Garden

Stamp Set:  Greenhouse Garden
Card Stock:  Soft Suede, Garden Green, Dusty Durango, Naturals Ivory, and Presto Patterns Specialty DSP
Ink:  Soft Suede, Garden Green, and Dusty Durango
Accessories:  Big Shot, Scallop Square Die,Stamp-A-Ma-Jig, and Brayer

To create the orange paper, use the brayer to apply the Dusty Durango Ink.

Sunday, April 11, 2010

Greenhouse Garden and Teeny Tiny Wishes

Stamp Sets:  Greenhouse Garden and Teeny Tiny Wishes
Card Stock:  Shimmery White, Pretty in Pink, and Basic Black
Ink:  Pretty in Pink and Regal Rose
Accessories:  Eyelet Border Punch, Pretty in Pink 5/8 Inch Satin Ribbon, Big Shot, & Perfect Polka Dots Textured Impressions Folder

Nature Silhouettes

Stamp Set:  Nature Silhouettes
Card Stock:  Soft Suede, Old Olive, and & Confetti Cream
Ink:  Soft Suede & Old Olive
Accessories:  Big Shot, Texture Plates Kit #4, Scallop Circle Punch, & 1 3/8 inch Circle Punch

After I ran the Old Olive Card through the Big Shot using the Texture Plate, I rubbed the Soft Suede Ink pad lightly across the raised edges to add a distressed look to the card stock.

Courage

Stamp Set:  Courage
Card Stock:  Very Vanilla, Night of Navy and Bravo Burgundy
Ink:  Night of Navy and Bravo Burgundy
Accessories:  Stampin' Sponges, Big Shot, Scallop Circle #2 Bigz Die

Stamp your image on card stock already cut to the correct size.  Use the Big Shot to punch out the Scallop Circle.  Place the negative image (see example below) over the pre-stamped image.  Apply ink over the stamped image-darker on the outside edge, lighter in the middle.  Remove the negative image, and use the sponge to apply color to the border of the card stock if desired (you can either use the same color ink used on the stamped image or a contrasting color).

 Negative Image from cut out of Scallop Circle #2

Saturday, April 10, 2010

Fifth Avenue Floral

Stamp Set:  Fifth Avenue Floral
Card Stock:  Nouveau Chic DSP, Whisper White, Basic Gray, & Sage Shadow
Ink:  Basic Gray and Black Staz On Ink, Sage Shadow and Apricot Appeal Watercolor Crayons
Accessories:  Basic Gray Taffeta Ribbon, Aqua Painters

Dream Gardens

Stamp Set:  Dream Gardens
Card Stock:  Whisper White, Real Red, Basic Black
Ink:  Real Red and Basic Black
Accessories:  Post It Notes, Sponge Daubers, Big Shot, and Perfect Detals Texturz Plate

To create the frames in the corners, apply post it notes around all the edges of the stamped image.  Don't pre- trim your image.  Apply ink to the sponge daubers, then carefully apply in each of the corners.  Peel off the post it notes, then trim your image to the desired size.

French Flair

Stamp Sets:  French Flair and Teeny Tiny Wishes
Card Stock:  Bermuda  Bay and Very Vanilla
Ink:  Bermuda Bay and Very Vanilla Craft Ink
Accessories:  Scalloped Heart Embosslit, Big Shot, Very Vanilla Embossing Powder, Heat Tool, and Modern Label Punch

Thursday, March 11, 2010

Well Scripted


Stamp Set: Well Scripted
Card Stock: Basic Black and Brushed Silver
Accessories: Basic Black 5/8 inch Satin Ribbon, Perfect Polka Dot Embossing Folder, Big Shot, 1-3/8 inch Square Punch, Scallop Trim Border Punch, and Scallop Trim Corner Punch

To create the scallop border square, begin with a 2 x 2 inch square. Punch one corner using the Scallop Trim Corner Punch, then punch the opposite corner, punch the remaining 2 corners. This ONLY works with the Scallop Trim Corner Punch.

Manhattan Flower


Stamp Set: Well Scripted
Card Stock: Whisper White and Melon Mambo
Ink: Melon Mambo
Accessories: Big Shot, Manhattan Flower Embossing Folder, Color Spritzer Tool, and Pink Passion Stampin' Write Marker

Messages for Mom

Stamp Set: Messages for Mom
Card Stock: Almost Amethyst, Certainly Celery, and Water Color Paper
Ink: Almost Amethyst and Certainly Celery
Accessories: Aqua Painters, Masterpiece Ribbon Originals, Soft Subtles Brads, Color Spritzer Tool, and Almost Amethyst Stampin' Write Marker

6 x 6 Scrapbook Page


Stamp Sets: Very Vintage Jumbo Wheel and Ever After Stamp Set
Card Stock: Whisper White, Lovely Lilac, and So Saffron
Ink: Lovely Lilac and So Saffron Jumbo Ink Cartridge
Accessories: Elegant Eggplant Grosgrain Ribbon, Big Shot, Scallop Square Die, Perfect Details Texturz Plate, Scallop Square and 1-1/4 inch Square Punches

That's my niece in the picture =)

Vintage Vogue


Stamp Set: Vintage Vogue
Card Stock: Whisper White and Crushed Curry
Ink: Crushed Curry
Accessories: Finial Press Embossing Folder, Big Shot, and Crushed Curry Polka Dot Grosgrain Ribbon

Stamp sentiment on panel before running it through the Big Shot in the Finial Press Embossing Folder

Medallion


Stamp Sets: Medallion and Whimsical Words (Sale-A-Bration '10)
Card Sock: Rich Razzleberry and Razzleberry Lemonade DSP
Ink: Basic Black, Versamark and Rich Razzleberry
Accessories: Anti Static Bag, Brayer, Clear Embossing Powder, Curly Label Punch, Dimensionals, and Heat Tool

Rub anti static bag on Designer Paper. Stamp the Medallion in Versamark, cover with Clear Embossing Powder, then heat with heat tool. After the image has cooled, run the brayer with black ink repeatedly over the image until the background paper is covered. With a tissue, wipe embossed image clean of black ink.

Friday, December 18, 2009

Vintage Vogue and Very Vintage


Stamp Set: Very Vintage Jumbo Wheel and Vintage Vogue Stamp Set (Occasions Mini Catalog)
Paper: Very Vanilla, Cameo Coral, and Old Olive
Ink: Old Olive and Cameo Coral
Accessories: Stamp A Ma Jig

Whimsical Words


Stamp Set: Whimsical Words (Sale A Bration Set)
Paper: Pretty in Pink, Whisper White, and Certainly Celery
Ink: Stampin' Pastels, Pretty in Pink & Certainly Celery Stampin' Write Markers
Accessories: Big Shot, Elegant Bouquet Textured Embossing Folder, Scallop Circle Punch, 1 3/8 inch Punch, and Q-Tips

I used the Stampin' Write Markers to ink the sentiment in the 2 different colors. I used a Q-Tip to apply the chalk to the flowers and stems.

Whimsical Words


Stamp Set: Whimsical Words (Sale A Bration Set)
Paper: Very Vanilla and Rose Red
Ink: Rose Red
Accessories: Big Shot, Movers and Shakers Curly Label Bigz Die, Punch Windows, Rose Red Grosgrain Ribbon, Full Heart Punch, & Pinking Hearts Border Punch (Occasions Mini Catalog)

Monday, October 26, 2009

Serene Snowflakes and Christmas Punch


Stamp Sets: Serene Snowflakes (Holiday Mini Catalog) & Christmas Punch (Hostess Set)
Card Stock: Night of Navy and Shimmery White
Ink: Night of Navy
Accessories: Sponge Daubers, Frost White Shimmer Paint (Holiday Mini Catalog), Wide Oval Punch, and Stampin' Dimensionals

Pour a small amount of Shimmer Paint on a non-porous surface (I used an old CD). Apply the Shimmer Paint to the stamp using a Sponge Dauber. Stamp image on dark card stock and allow to dry. I stamped the sentiment of Shimmery White card stock, then used the Wide Oval punch to punch it out. I then attached it to the card front using Stampin' Dimensionals.

Charming


Stamp Set: Charming (Holiday Mini Catalog)
Card Stock: Always Artichoke, Creamy Caramel, & Rose Red
Ink: Always Artichoke, Whisper White, Creamy Caramel, & Close to Cocoa Ink Pads, Cameo Coral, Real Red, & Always Artichoke Stampin' Write Markers
Accessories: Aquapainters & Sponge Daubers

Stamp image on Creamy Caramel card stock. Apply highlights using the Aquapainter and Whisper White Craft Ink. I highlighted the centers of all the flowers. Allow image to dry. Using the sponge daubers, apply the Creamy Caramel ink close to the stamped highlighted image. Use another sponge dauber to apply the Close to Cocoa ink toward the outer edges of the card stock. I applied Creamy Caramel ink to the edges of the Creamy Caramel card stock attached to the card base.


Plenty of Petals and Holiday Best


Stamp Sets: Holiday Best (Level 1 Hostess Set)
Card Stock: Whisper White and Real Red
Ink: Glorious Green Ink Pad and Real Red Stampin' Write Marker
Accessories: Big Shot, Plenty of Petals Textured Embossing Folder, and Blender Pens

After I applied ink to the stamp, I used the Blender Pens to wipe the color off the cardinal, then used the Real Red Stampin' Write Marker to color the bird red. Wipe the tip of the Blender pen on a piece of scratch paper until it comes clean.

Tuesday, September 22, 2009

Elegant Bouquet


Stamp Set: Teeny Tiny Wishes
Ink: Almost Amethyst
Card Stock: Whisper White and Almost Amethyst
Accessories: Big Shot, Elegant Bouquet Textured Impressions Embossing Folder, Brayer, Stamp A Ma Jig, Modern Label Punch, and Whisper White Organza Ribbon

Apply Almost Amethyst ink to the brayer. Open the Elegant Bouquet Embossing Folder. Run the inked brayer over the inside of the embossing folder-the side with the black arrow on it. Carefully place the card stock in the folder and close. Run through the Big Shot. Use the Modern Label Punch on the card stock. Layer on top of the Whisper White card stock. Use the stamp a ma jig to line up the saying from the Teeny Tiny Wishes Stamp Set, and then stamp the sentiment in Almost Amethyst ink. Tie the White Organza ribbon with a knot, then assemble the rest of the card.

Oval All and Elegant Bouquet


Stamp Set: Oval All
Card Stock: Basic Black, Basic Grey, and Nouveau Chic DSP
Ink: Whisper White Craft Ink
Accessories: Big Shot, Elegant Bouquet Textured Impressions Embossing Folder, Brayer, and Scallop Oval Punch

Run the Nouveau Chic DSP through the Big Shot in the Elegant Bouquet Embossing folder right side up. Run the Brayer over the Whisper White Craft Ink Pad until it is completely covered. Run the Brayer lightly over the raised image. Cover the unraised portion of the card with scrap paper or card stock to avoid transferring the ink to the flat portion of the card. Do not handle the DSP until the white ink is completely dry. Use your heat tool to speed up the drying time.

Garden Whimsy and Elegant Bouquet


Stamp Set: Garden Whimsy (saying in the upper left of card)
Card Stock: Melon Mambo and Crushed Curry
Ink: Melon Mambo
Accessories: Big Shot, Elegant Bouquet Textured Impressions Embossing Folder, and Brayer

Run the card stock through the Big Shot in the Elegant Bouquet Embossing folder. Ink the brayer with Melon Mambo ink, then lightly run across the raised image. If you have trouble getting ink on the flat portion of the card (the upper left of this card with no raised image), place a piece of scrap paper or card stock over the portion of the card you do NOT want ink on. Finish the card as desired.

Thursday, September 10, 2009

My Digital Studio Card


I used the My Digital Studio program to create this card. I used the Razzle Dazzle Stamp Set, Eyelet Border Stamp, and the Curly Label Punch. A quick way to design a card without wasting card stock, etc. Plan your project, then duplicate it with the stamps!

My Digital Studio

Here's a list of what contents are included in the My Digital Studio Software. There are about 2000 images included.
Future downloads will be available for purchase.


My Digital Studio Contents.docx

Sunday, August 30, 2009

Friends 24-7 & Friendly Words Jumbo Wheel

Stamp Sets: Friends 24-7, Friendly Words Jumbo Wheel
Ink: Baja Breeze (retired) and Chocolate Chip
Paper: Baja Breeze (retired), Chocolate Chip, and Very Vanilla
Accessories: Cuttlebug and Spellbinders Dies (used to cut the circle and scallop circle)

Friday, July 24, 2009

Medallion and Kind & Caring Thoughts

Stamp Sets: Medallion Background Stamp & Kind & Caring Thoughts
Card Stock: Whisper White & Baja Breeze (retired)
Ink: Whisper White & Baja Breeze (retired)

Medallion


Stamp Set: Medallion
Ink: Very Vanilla Kraft
Card Stock: Very Vanilla and Close to Cocoa
Accessories: Very Vanilla Embossing Powder, Heat Tool, Masterpiece Ribbon Originals, and Eyelet Border Punch

Extreme Elements and Extreme Guitar

Stamp Sets: Extreme Elements and Extreme Guitar
Card Stock: Very Vanilla, Old Olive, Soft Suede, and Not Quite Navy
Ink: Old Olive, Soft Suede, and Not Quite Navy
Accessories: Sponge Daubers

Gratuitous Graffiti


Stamp Set: Gratuitous Grafitti Background Stamp
Card Stock: Whisper White, Crushed Curry, and Bermuda Bay
Ink: Crushed Curry and Bermuda Bay
Accessories: Stampin' Sponges and Small Kind Thoughts Brocade Stencil (page 29 of the Definitely Decorative fall-winter 2009 brochure)

Stamp Gratuitous Graffiti in Crushed Curry on Whisper White Card Stock. Place the Kind Thoughts Brocade Stencil over stamped image. Hold the stencil firmly in place and use the Stampin' Sponge to apply Bermuda Bay ink to the stamped image. Adhere the layers to the front of your card stock when you are finished stenciling.

Thursday, July 9, 2009

In Color Line Color Combos

Love the new In Color line but don't know what goes with what color? Here's a chart to take the guesswork out of it!


US_CHART_incolorCombos_0910.pdf

Friday, July 3, 2009

Circle Circus, Teeny Tiny Wishes


Stamp Set: Circle Circus & Teeny Tiny Wishes
Card Stock: Very Vanilla, Soft Suede, & Bermuda Bay
Ink: Soft Suede & Bermuda Bay
Accessories: Scallop Circle & 1 1/4 inch Circle Punches, Big Shot, and Buttons #5 Sizzlits Die

Oval All


Stamp Set: Oval All
Card Stock: Crushed Curry, Melon Mambo, Rich Razzleberry, & Razzleberry Lemonade DSP
Ink: Rich Razzleberry & Melon Mambo Stampin' Write Markers
Accessories: Large Oval & Scallop Oval Punches

Christmas Punch Hostess Set


Stamp Set: Christmas Punch Hostess Set
Card Stock: Kraft & Old Olive
Ink: Rich Razzleberry
Accessories: Curly Label Punch, Big Shot, and Movers & Shapers Curly Label

Kind & Caring Thoughts


Stamp Set: Kind & Caring Thoughts Hostess Set
Card Stock: Very Vanilla & Dusty Durango
Ink: Very Vanilla Kraft Ink & Dusty Durango
Accessories: Big Shot, Top Note Biz Die, Large Oval & Scallop Oval Punches

Supply List for 2009-2010 Idea Book and Catalog

Here is the supply list for the projects in the 2009-2010 Idea Book and Catalog.


IBC0910USsupplies.pdf

Wednesday, July 1, 2009

Current Dormant List

These stamp sets are available for purchase; however, they are not in the current catalog.

Stamps

Item # Stamp Set Last Publication this Set Appeared in Page #
113407 Backwoods 2009 Spring-Summer Idea Book & Catalog 102
114492 Beautiful Baby 2009 Spring-Summer Idea Book & Catalog 208
114486 Birthday Wish 2009 Spring-Summer Idea Book & Catalog 208
113200 Branch Out 2009 Spring-Summer Idea Book & Catalog 100
114496 Celebrations 2009 Spring-Summer Idea Book & Catalog 208
113732 Central Park 2009 Spring-Summer Idea Book & Catalog 106
113206 Classic Sketches 2009 Spring-Summer Idea Book & Catalog 119
113226 Classy & Fabulous 2009 Spring-Summer Idea Book & Catalog 51
113750 Easter Beauty 2009 Spring-Summer Idea Book & Catalog 29
114024 Bella Pascua 2009 Spring-Summer Idea Book & Catalog 29
114498 Flowers in Silhouette 2009 Spring-Summer Idea Book & Catalog 208
113405 Font of You 2009 Spring-Summer Idea Book & Catalog 46
113216 For the Bride 2009 Spring-Summer Idea Book & Catalog 61
114028 Para la novia 2009 Spring-Summer Idea Book & Catalog 61
114494 Forever 2009 Spring-Summer Idea Book & Catalog 208
109425 Friend by Definition 2008 Fall-Winter Idea Book & Catalog 135
114488 Fun Flowers 2009 Spring-Summer Idea Book & Catalog 208
113716 Garden Greetings 2009 Spring-Summer Idea Book & Catalog 55
114490 Glad Friends 2009 Spring-Summer Idea Book & Catalog 208
111580 Grand Soiree 2008 Fall-Winter Idea Book & Catalog 126
113242 Hit the Road 2009 Spring-Summer Idea Book & Catalog 103
113710 Lexicon of Leaves 2009 Spring-Summer Idea Book & Catalog 101
113236 Man's Best Friend 2009 Spring-Summer Idea Book & Catalog 72
114423 Ocean Commotion 2009 Spring-Summer Idea Book & Catalog 97
113728 Playful Petals 2009 Spring-Summer Idea Book & Catalog 99
109276 Polka Dot 2008 Fall-Winter Idea Book & Catalog 135
111544 Putt Putt 2008 Fall-Winter Idea Book & Catalog 81
113240 Quilt Quips 2009 Spring-Summer Idea Book & Catalog 53
113754 Really Retro 2009 Spring-Summer Idea Book & Catalog 132
113403 Sip by Sip 2009 Spring-Summer Idea Book & Catalog 51
113726 Sweet Stems 2009 Spring-Summer Idea Book & Catalog 99
113250 That's Funny 2009 Spring-Summer Idea Book & Catalog 63
113688 Wonderful Watercolors 2009 Spring-Summer Idea Book & Catalog 85
114032 Acuarelas Maravillosas 2009 Spring-Summer Idea Book & Catalog 85

Wheels

Item # Wheel Last Publication this Wheel Appeared in Page #
113836 Fashion Forward 2009 Spring-Summer Idea Book & Catalog 51
111259 Pinch Me 2009 Spring-Summer Idea Book & Catalog 28
107559 Spot On 2009 Spring-Summer Idea Book & Catalog 120
107560 Watercolor Vine 2009 Spring-Summer Idea Book & Catalog 84

Monday, May 25, 2009

Inspired by Nature

Stamp Set: Inspired by Nature
Ink: Bashful Blue, Night of Navy, and Versamark
Paper: Glossy White, Bashful Blue, and Night of Navy
Accessories: Clear Embossing Powder, Heat Tool, Brayer, and Ticket Corner Punch

Use the brayer to apply Bashful Blue ink to Glossy White Card Stock. Allow to dry. Stamp image in Versamark then emboss using the heat gun. Use the brayer to apply Night of Navy ink to Glossy White Card Stock. Use a paper towel to remove ink from the embossed image. Repeat the last 2 steps if necessary. Use Ticket Corner Punch on top 2 layers of card, then assemble.

Bloomin' Beautiful

Stamp Set: Bloomin' Beautiful
Ink: Black Staz On, So Saffron, More Mustard, and Old Olive, Close to Cocoa Stampin' Write Marker
Paper: Whisper White and So Saffron
Accessories: Aqua Painters, Big Shot, Top Note Bigz Die, Color Spritzer Tool, and Stampin' Sponges

Sip by Sip


Stamp Set: Sip by Sip
Paper: Sahara Sand, Bordering Blue, and Bravo Burgundy
Ink: Bordering Blue and Bravo Burgundy

Le Jardin Boutanique

Stamp Set: Le Jardin Boutanique
Ink: Always Artichoke
Paper: Always Artichoke and Kraft
Accessories: Scallop Oval and Large Oval Punches

Happiness Is a Journey

Stamp Set: Happiness Is a Journey
Ink: Basic Black and Versamark
Paper: Newspaper, Not Quite Navy, and Basic Black
Accessories: Crafter's Tool Kit, Vintage Brads, Clear Embossing Powder, Heat Gun, and Brayer

Newspaper Reveal Technique
This technique requires bold, open stamps and black or dark ink.

Stamp image in Versamark on newspaper. Emboss with clear embossing powder. Apply ink to embossed image using brayer. Go over the image several times. With a paper towel, wipe ink off the embossed image. If needed, brayer more ink on image. With a paper towel, wipe ink off the embossed image. Trim image to desired size, then attach to card stock.

Don't trim your newspaper until you have finished the above steps. Be careful not to overheat the newspaper as there is the possibility of starting a fire since the newspaper is so thin. Apply adhesive to all 4 edges of your trimmed image.

Related Posts Plugin for WordPress, Blogger...